|
|
| Information Services Department |
|
Tips & Tutorials:
OS
X
Basics :
 The
Finder: The
Finder:
|

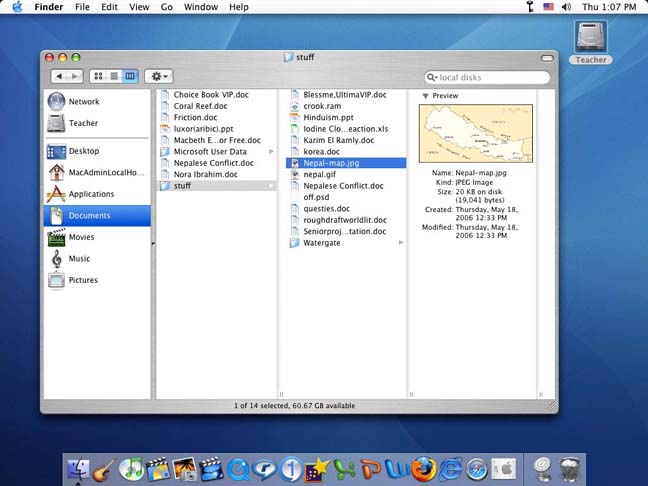
The
Finder
is
the
primary
application
that
begins
to
run
when
you
log
on
to
your
workstation,
the Finder
gives
you
access
to
applications,
documents,
removable
storage,
and
servers.
Through
Finder
Windows,
you
can
manipulate
and browse
folders,
applications,
and
documents.
|
|  The Finder
Menus: The Finder
Menus:
|
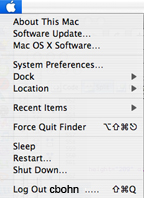
• The
Apple
Menu
Gives
you
access
to
system-wide
commands,
important
system
preferences,
and
recently
used
items,
also
the
logout
command
and
the
restart
and
shut
down
commands.
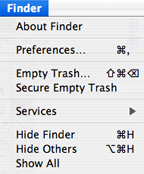
• The
Finder
Menu
Contains
all
of
the
Mac's
application-specific
tasks
such
as
preferences
and
services.
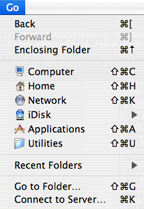
• The
Go
Menu
Tracks
the
folders
you've
used
recently
and
stores
your
favorite
items
such
as
documents,
folders,
or
applications
in
a
centralize
location
and
it
gives
you
access
to
the
servers
on
the
network.
|
| |
|
|
 The Finder
Window: The Finder
Window:
|
• Windows
Toolbar

• Window
Controls
The window controls resemble traffic lights. Select Red to close the window (stop),
Yellow to minimize the window (slow), and Green to zoom the window (go)
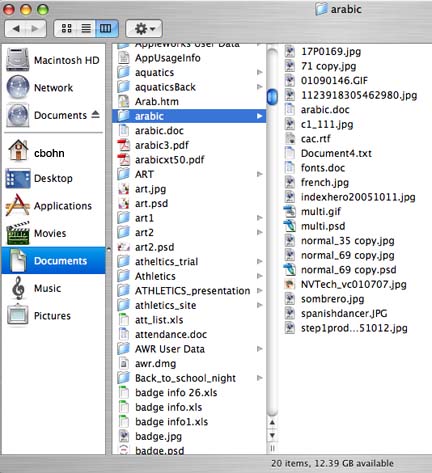
• Window
Views
You
can
choose
between
icon,
list
and
column
view
to
show
your
files.
With
the
new
column
view
you
can
quickly
move
around
drives
with
hundreds
of
files
and
folders
on
them.
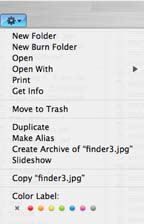
• Action
Menu
The
commands
that
appear
on
this
menu
depend
on
the
item
you
first
click
on
within
the
window,
i.e.,
a
file,
a
folder
or
an
item
on
the
sidebar.
For
example,
after
clicking
first
on
a
file
icon
the
Action
icon
will
display
a
menu
similar
to
that
in
the
figure
on
the
side.
• Search
Box
You
can
use
the
Search
box
at
the
far
right
of
the
Toolbar
to
locate
items
on
your
computer,
the
results
will
appear
in
a
pane
on
the
top
right
of
the
window.
Locate
the
item
you’re
looking
for
by
scrolling
through
the
list
of
items
and
clicking
on
that
item’s
name
once
you
locate
it.
The
path
to
that
item
will
appear
in
the
pane
below
the
list
of
items.
• The Side Bar
The Sidebar is a quick way to locate files and folders on your hard drive.
By double clicking the hard drive and selecting the various locations located
on the left of the window, you can quickly go to those folders without going
through multiple steps.
You can add shortcuts to any file or folder to the side
bar by simply dragging the icon from any finder window to the sidebar area.
|
| |
 The
Home
Folder
: The
Home
Folder
:
|
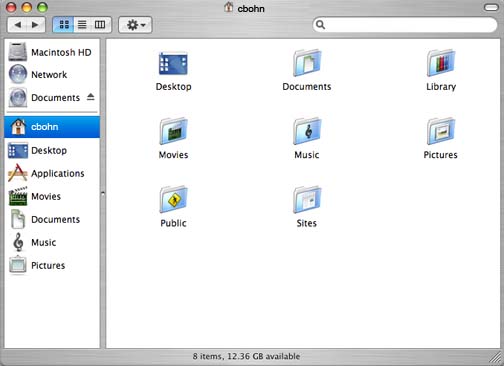
Each
user
of
a
Mac
OS
X
machine
gets
a
home
folder,
stored
within
the
users
folder
on
the
hard
disk.
Users'
home
folders
are
where
they
keep
all
their
private
files,
music
libraries,
photo
libraries
and
application
preferences.
Users
of
the
machine
can't
see
files
in
the
other
home
folders.
|
| |
 The
Dock: The
Dock:
|
The
Dock
is
used
for
organizing
the
workspace
environment.
It
provides
you
with a customizable space where you can add shortcuts of your commonly used
files and applications for easy access.
Here
some
examples
of
what
to
add
to
the
Dock:
• A
commonly
used
application.
• A
project
folder.
• Your
favorite
URL.

Applications
that
have
the
triangles
below
(or
next)
them
are
running.
•
Adding
a
shortcut
to
the
Dock:
Adding
an
application,
file,
or
folder
to
the
Dock
is
as
simple
as
dragging
it
there.
Follow
these
steps
to
add
an
icon
to
the
Dock:
-
Open a Finder window containing an application, file, or folder that you
use frequently.
-
Click the item that you want to add to the
Dock and drag it out of the Finder window and onto the Dock, An icon
for this item now appears on the Dock.

• Removing
an
item
from
the
Doc:
Drag
the
item
from
the
Dock
onto
the
desktop.
It
disappears
in
a
puff
of
smoke.
The
original
item
remains
in
its
original
location.

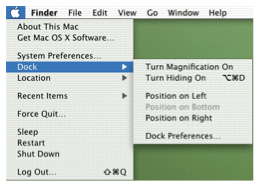
• Changing
the
dock
settings,
preferences:
-
Select Dock from the Apple Menu.
-
Explore
by
making
changes
and
see
what
happens
to
the
way
the
Dock
functions
and
looks.
|
| |
 Saving
files
in
Mac
OS
X
applications: Saving
files
in
Mac
OS
X
applications:
|
Home
Folders
are
primarily
where
you
save
your
files;
the
extension
at
the
end
of
the
file
name
tells
you
what
type
of
file
it
is
(.jpg,
.pdf,
.doc,
.html,
.txt).
You
can
rename
files
or
folders
by
clicking
directly
on
a
file’s
name
and
holding
down
the
mouse
button– just
click
slowly
on
the
name
and
hold
for
a
few
seconds!
You
can
also
save
things
in
the
Shared
folder.
To ensure your word processed document can be viewed on as many computers
as possible, save it as a “Rich Text” document (.rtf). People who use
Microsoft Word, Works, Word Perfect and other cross platform applications can
view this format. Sometimes documents are unreadable on PCs because there is
no file extension on the end of the file name so the computer doesn’t understand
how to open it. Make sure the file has an extension at the end of the filename
and be sure the “Append file extension” box is checked when saving
documents in Office X.
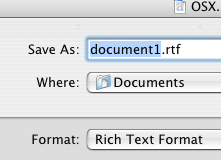

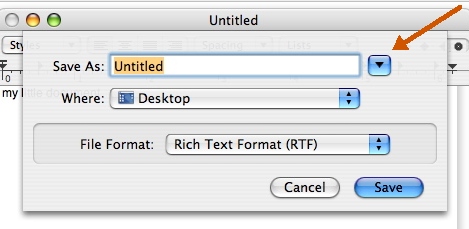
It is important to understand where you save your files so you can locate
them again. Click the disclosure triangle in the dialog sheet to see more save
locations and additional options.
|
| |
 Creating
PDF
Files
: Creating
PDF
Files
:
|
PDF
(Portable
document
file)
files
are
files
that
are
created
to
be
cross-platform
making
them
viewable
on
virtually
any
system
and
small
in
file
size.
Creating
PDF's
in
OS
X
is
as
simple
as
selecting
the
print
command
from
the
Apple
Menu
in
whichever
application
you
are
working
in,
selecting
printer,
and
clicking
the Save
as
PDF button.
|
| |
|  Notable
Keyboard
Equivalents: Notable
Keyboard
Equivalents:
|
· Hide
Application: Command-H
· Minimize
Window: Command-M
· Hide
Dock: Option-Command-D
· Home: Option-Command-H
· Applications: Option-Command-A
· Connect
To
Server: Option-Command-K
· Printing: Command-P
|
| |
 Download
this
tutorial
as PDF Download
this
tutorial
as PDF
|
 Back to Tips & Tutorials Back to Tips & Tutorials
|
| |
|
|
|
|
|